
There’s a quiet magic in homemade bread, a kind of humble excellence that never fails to remind me why food is more than fuel. I still hear the faint, contented sighs of my grandmother as she pulled a golden loaf from the oven one late autumn afternoon. The sunlight filtering through the kitchen window pooled on the wooden table, casting a warm glow over the flour dusted countertop. The crust crackled softly as she sliced into the freshly baked bread, releasing the rich aroma that seemed to embrace the whole room.
Homemade bread holds a lineage, a connection between hands shaping dough through centuries and the stories baked into each bulge and crumb. For me, it’s that feeling of continuity, of participation, that makes homemade bread so profound. Each loaf carries echoes of those who have risen early to feed their families or gathered on cold evenings around a hearth. It’s a form of storytelling through taste: the slight tang from a fermented starter, the toasty crackle of a perfect crust, the tender crumb yielding beneath a knife.
I recall those kitchen moments not out of nostalgia, but because they shape how I think about bread dough preparation today. There’s a rhythm to it—a patience to the bread rising techniques—that transforms simple ingredients into something almost sacred. The very process of waiting, watching the dough swell and bubble, is a meditation. It’s a reminder that good things need time.
In sharing this Homemade Bread story, I want to invite you to slow down, observe, and engage with the magic tucked inside your own oven. Let’s walk through the art of artisan bread making, the components that make it special, the steps that shape it, and the joy of bringing fresh bread to your table. Along the way, I’ll share insights and encourage you to make this bread your own, turning each baking into a meaningful kitchen moment.
The Components
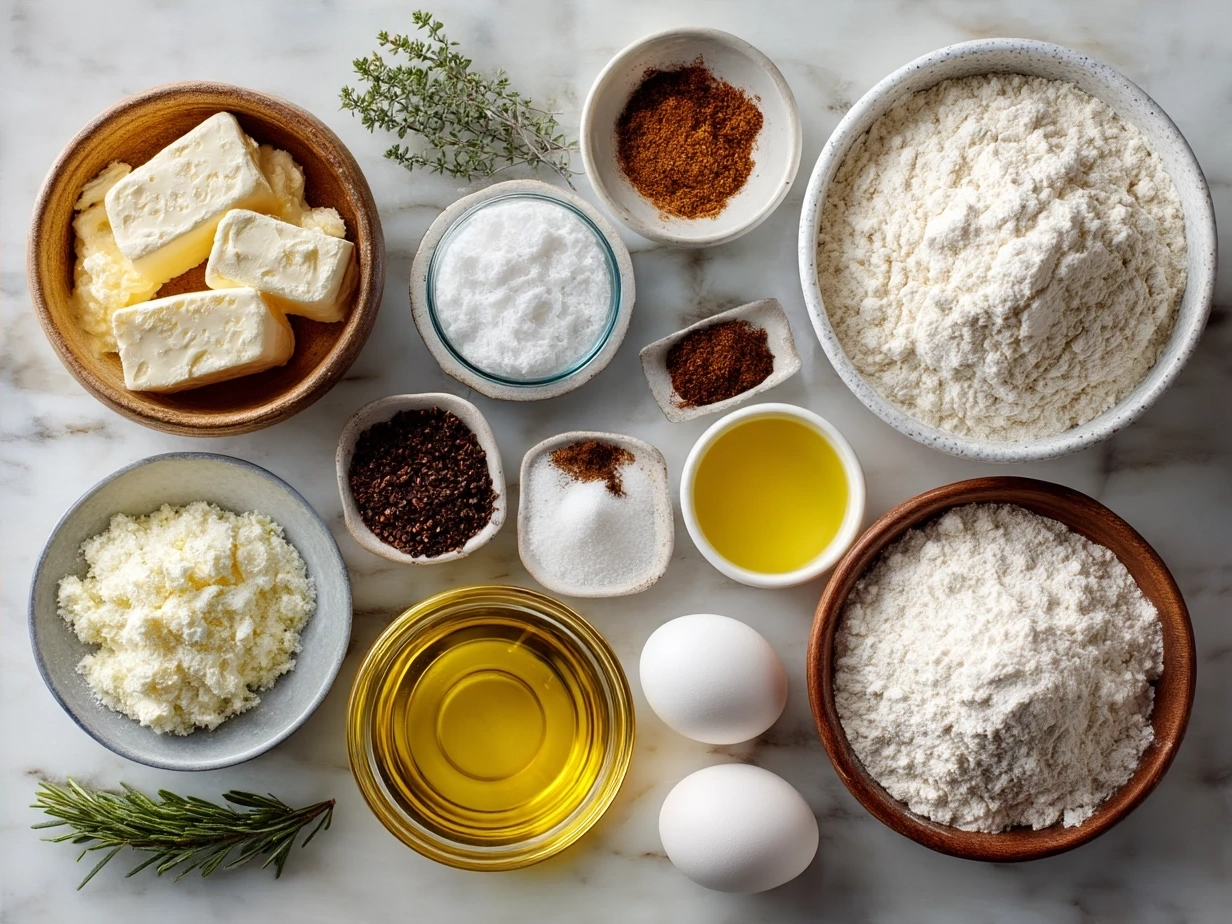
The ingredients for homemade bread are deceptively simple, yet their quality and balance tell the bulk of the story. Here’s what goes into a basic loaf that breathes life into homemade bread:
- Bread flour – 500g: Look for bread flour with a high protein content for stronger gluten development, which creates the structure and chewiness you want. You can often find this at farmers markets or specialty stores. I choose organic bread flour when available for its deeper flavor profile.
- Water – 350ml, lukewarm: Fresh, clean water matters. Tap water’s fine, but if it has a strong chlorine taste, filtered water is better. Water temperature guides yeast activation, so lukewarm is key.
- Active dry yeast – 7g (1 packet): Yeast is alive and delicate. I prefer using fresh packets over jarred yeast because its rise tends to be more predictable.
- Salt – 10g (about 1 ½ tsp): Salt strengthens gluten and enhances flavor. It’s a small amount that transforms simple dough into something savory and satisfying.
- Olive oil – 30ml (optional): For softer crumb and added flavor, some homemade bread recipes call for a little oil. It’s optional but worth considering if you enjoy softer crusts.
This homemade bread adapts well to what’s available. Whole wheat flour or spelt can replace some bread flour to add nuttiness and depth. But I’ve found that when I swap flours, I watch the bread rising techniques with extra care since different flours absorb water at different rates.
Ingredient preparation turns into a quiet ritual. Measuring flour precisely matters—it’s surprising how much difference a handful can make. I sift the flour lightly to avoid clumps and pulse the yeast in warm water to wake it gently. For me, this stage is about more than assembling ingredients; it’s a moment to anticipate the transformation underway.
For those curious about artisan bread making nuances, this homemade bread shares techniques with other favorites. You might find additional methods described in this homemade bread guide from The Clever Carrot, which offers insight into maintaining starter cultures and slow fermentation for rich flavor.
The Process
Making homemade bread requires patience and attention, but the transformations along the way make every minute worth it. Here is the step-by-step journey to your own loaf:
- Activate the yeast: Begin by mixing the active dry yeast with lukewarm water. After about 5 minutes, you’ll notice bubbles forming—a sign the yeast is lively and ready for action.
- Mix dry ingredients: In a large bowl, combine the bread flour and salt. This simple step readies the dry base before adding liquids.
- Combine wet and dry: Pour the yeast mixture and olive oil into the flour, stirring gently until a rough dough forms.
- Knead the dough: Transfer to a floured surface. Kneading builds gluten strands, essential for airy crumb and chewy texture. This stage requires 10-12 minutes of firm but patient kneading. You will feel the dough shift from sticky and loose to smooth and elastic.
- First rise: Place the dough in a lightly oiled bowl, cover with a damp cloth, and leave it in a warm spot. This rise typically takes 1-2 hours or until the dough doubles in size. Watch as your homemade bread’s volume inflates, almost as if the yeast is breathing life into the dough.
- Shape the loaf: Gently punch down the dough and form it into a tight round or oblong shape. Let it rest for 10 minutes before the second rise.
- Second rise: Place the shaped dough on a parchment-lined baking surface. Cover loosely and let it rise again for about 45 minutes. Your homemade bread signals readiness through a gentle spring-back when pressed.
- Prepare for baking: Preheat your oven to 220°C (425°F). For a crusty top, place a shallow pan with water at the bottom of the oven to create steam.
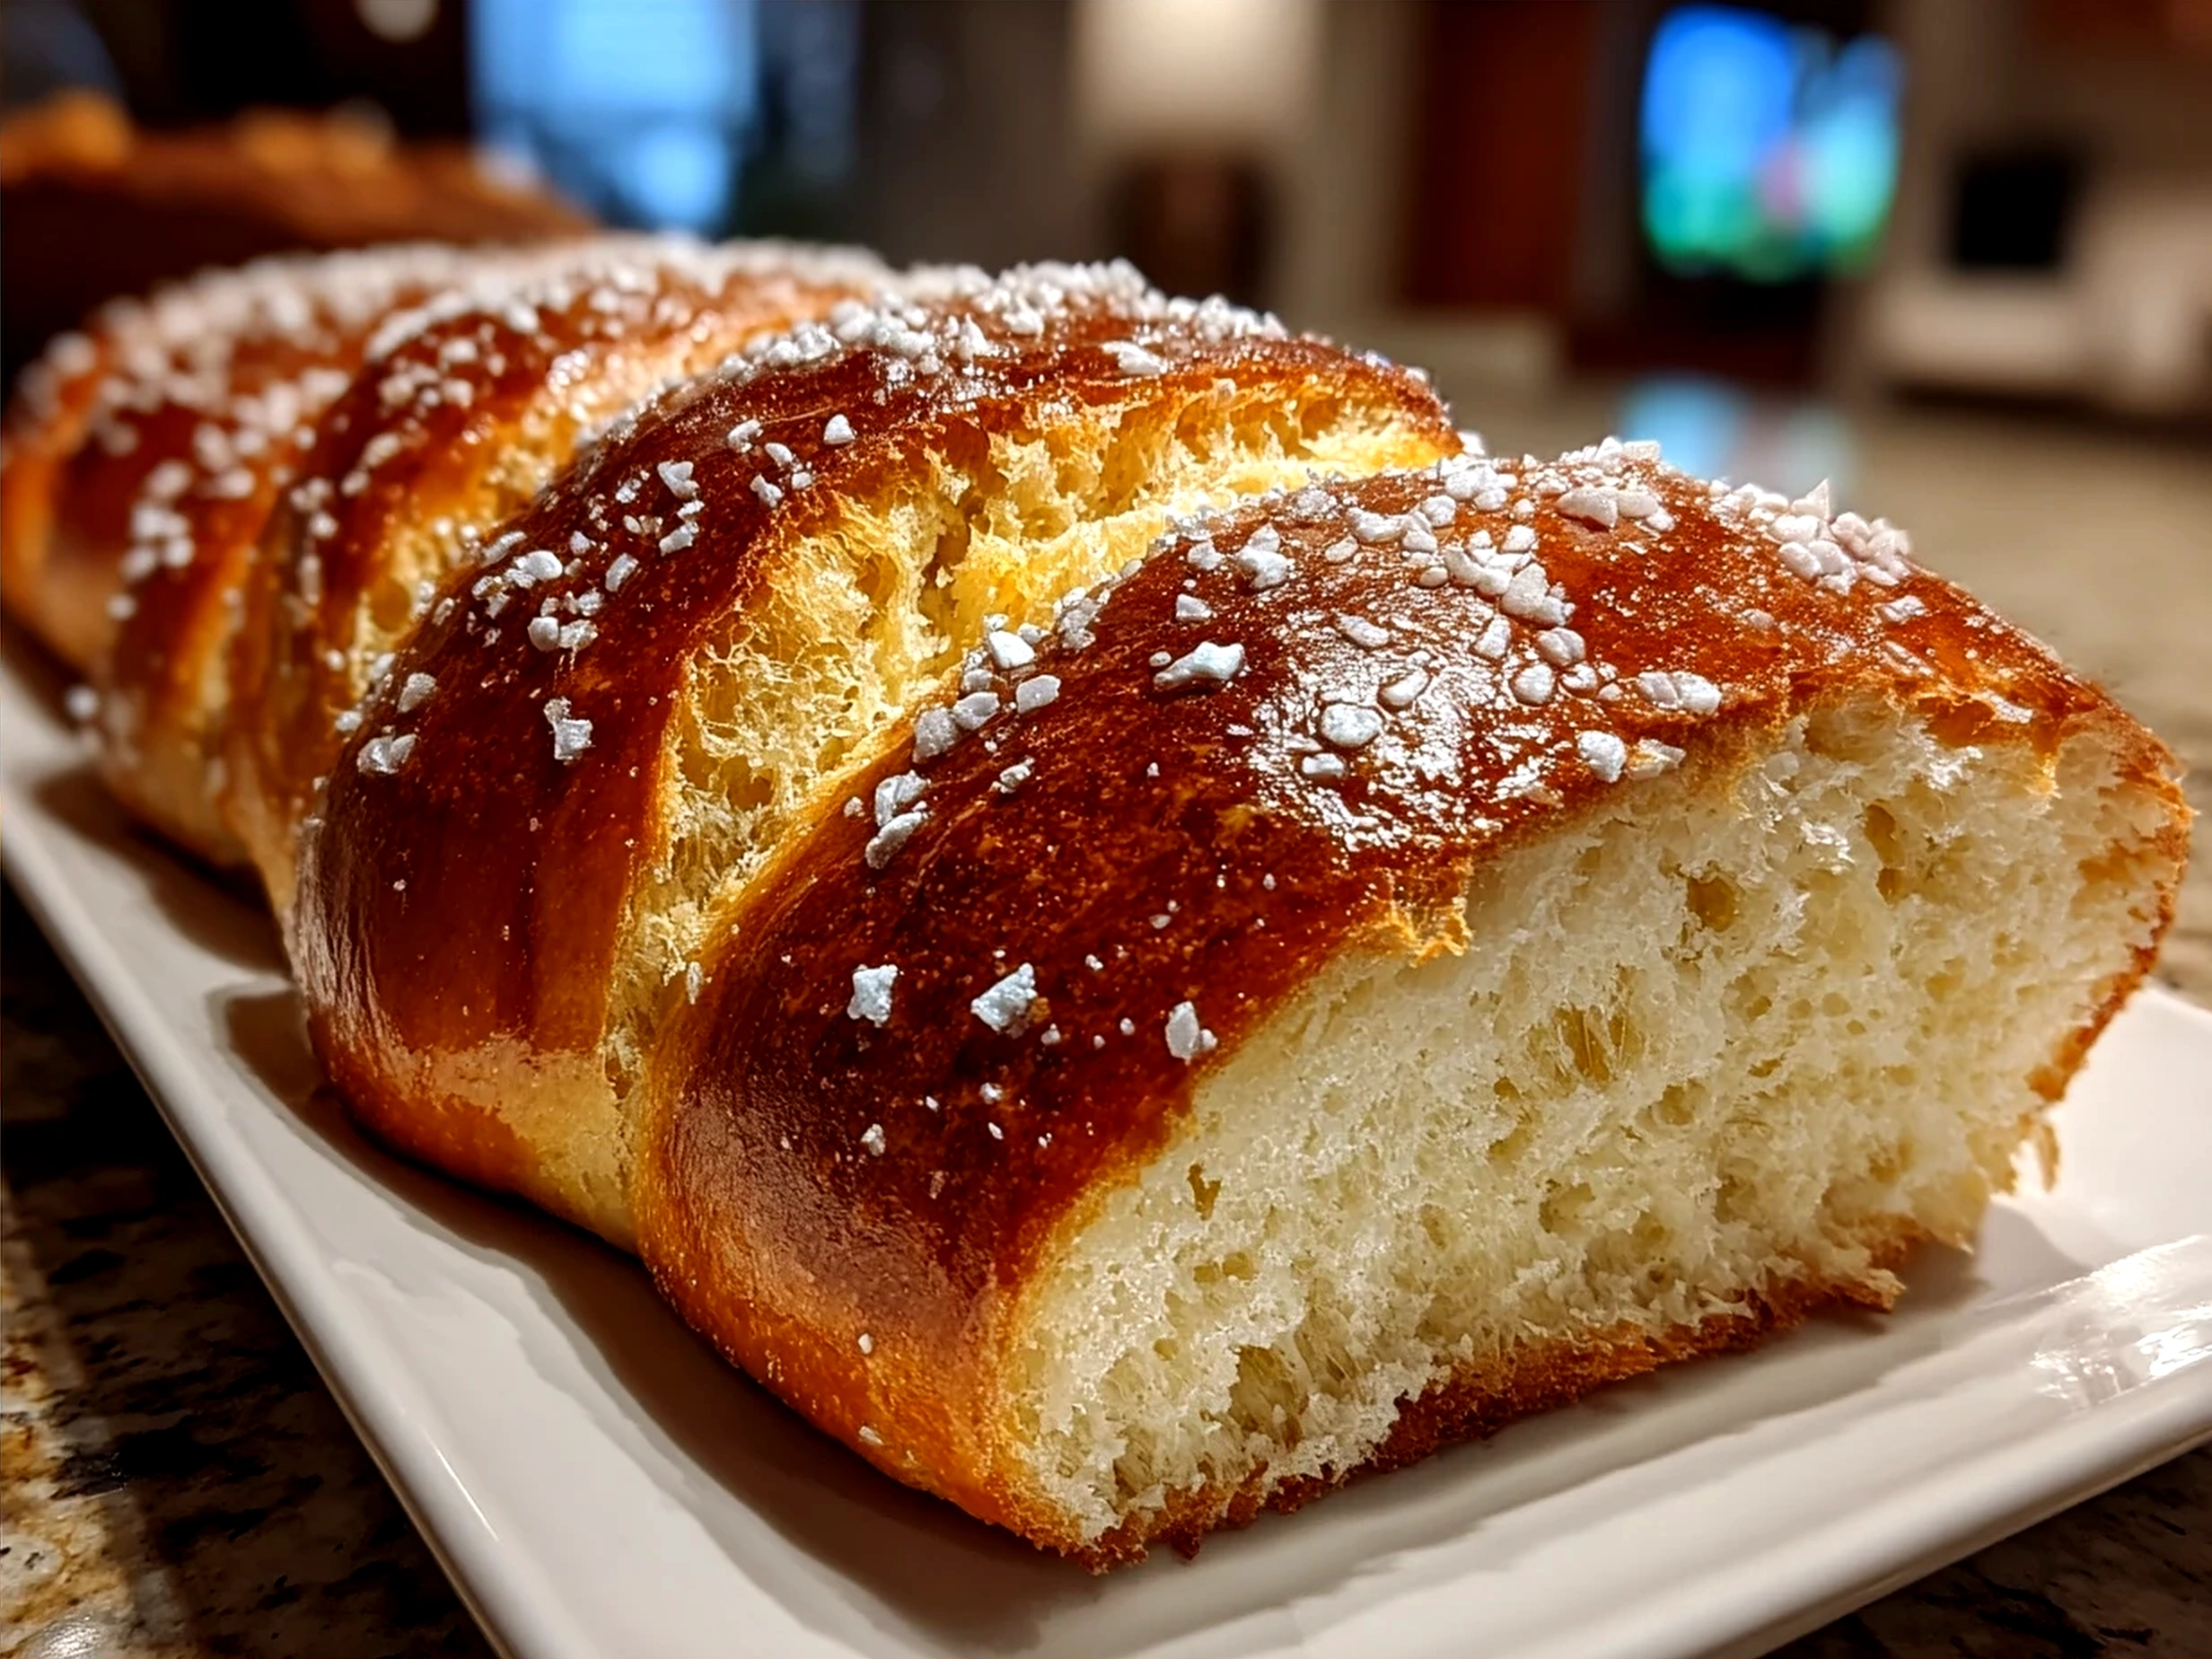
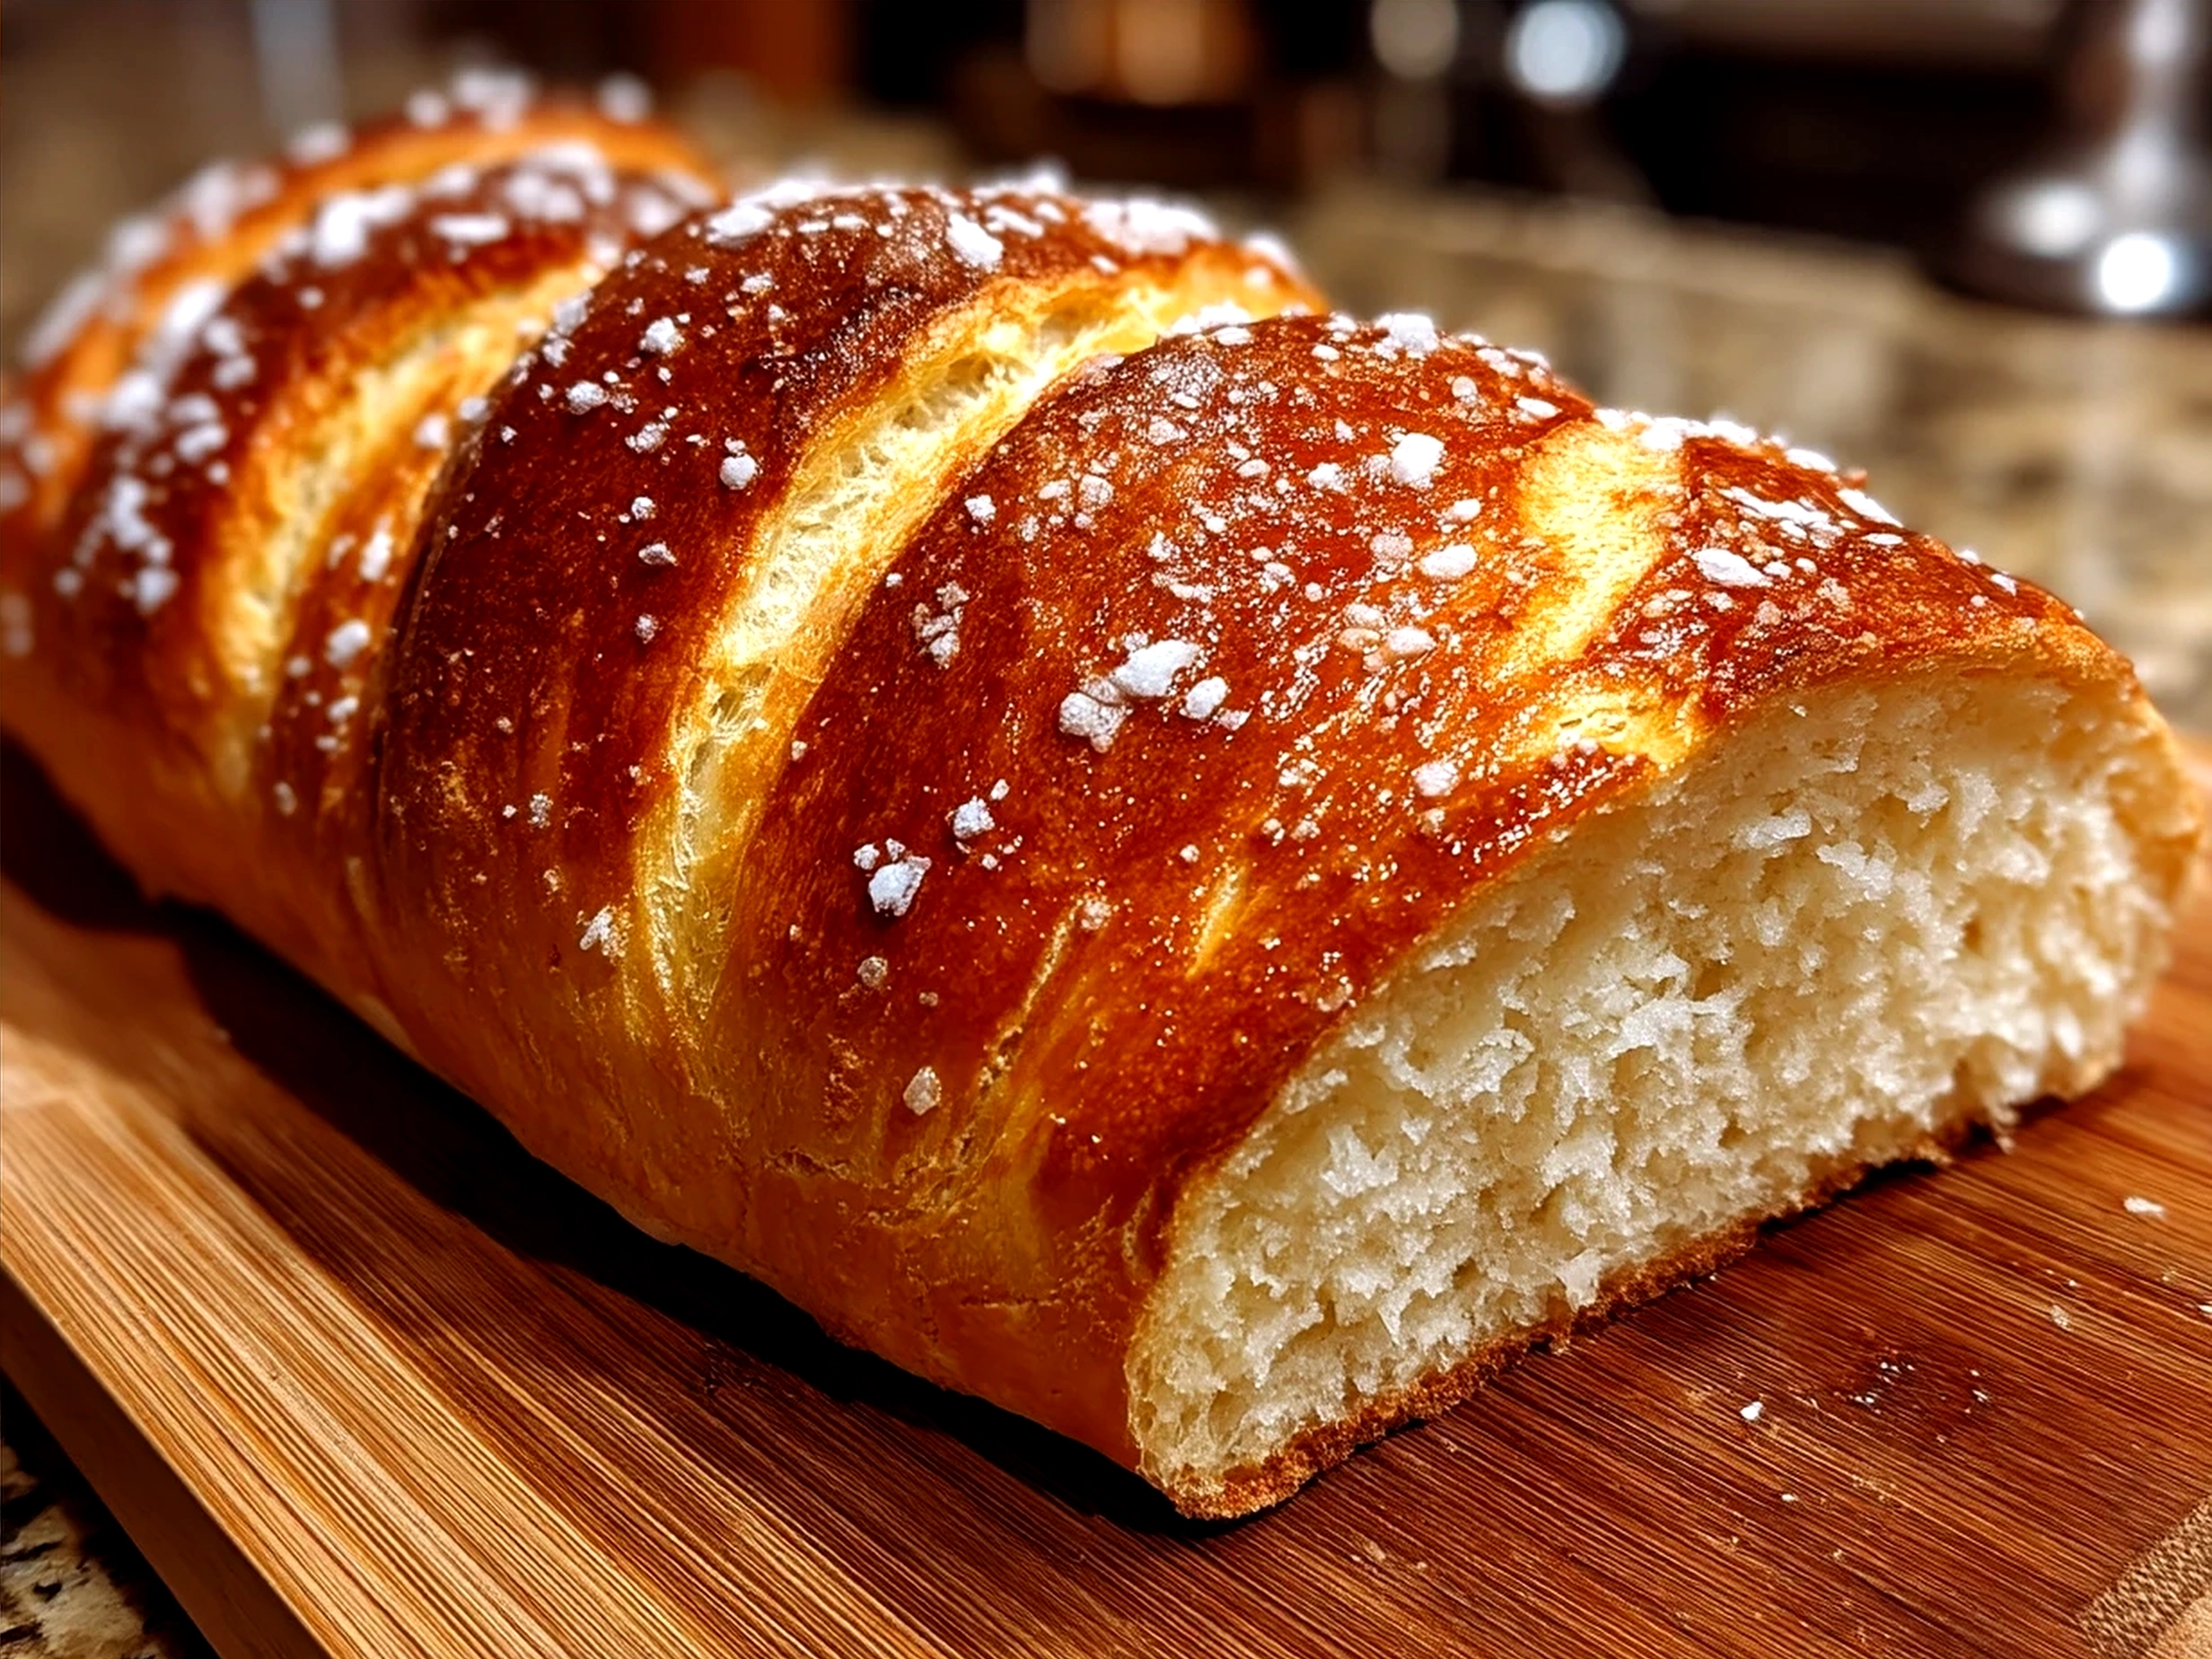
- Bake: Score the dough’s surface with a sharp knife to control expansion. Bake for 30-35 minutes. Your oven will fill with the intoxicating aroma of freshly baked bread crust forming a golden-brown shell.
- Cool: Once the loaf sounds hollow when tapped, transfer to a wire rack. Cooling lets the crumb set properly.
This phase is a deep kitchen moment, filled with sensory clues—how the dough feels in your hands, how the crust glistens with steam’s touch. Repeated making highlights the importance of each step and the subtle variables like room temperature or flour brand that influence results.
If your curiosity stretches toward artisan bread making with less fuss, consider the master recipe reviewed at Artisan Bread in Five Minutes, which uses a no-knead approach. It’s a reminder that homemade bread wears many faces, each worth the respect of attentive technique.
Bringing It to the Table
Homemade bread has a generosity that welcomes a range of occasions—from weekday lunches to slow weekend dinners.
This loaf pairs beautifully with something as humble as butter, letting the warmth of freshly baked bread melt into it. It shines alongside roasted vegetables, hearty soups, or sharp cheeses, turning simple meals into moments of comfort.
Consider serving homemade bread during family gatherings, where breaking bread becomes a shared ritual. The act itself invites conversation and connection, weaving a thread through the meal that is as nourishing as the food.
Presentation matters here — a dusting of flour on the crust, slices arranged in a basket lined with linen, inviting eager hands and appreciative smiles. For seasonal variation, integrating fresh herbs into dough can echo summery garden harvests, or sprinkling seeds on the crust brings texture and earthiness in colder months.
Friends often remark on how the crackling homemade bread crust announces the bread’s readiness even before the first slice. Some have told me the smell alone is enough to make a day feel special, a reminder that food shapes memories in subtle ways.
For those interested in breads with a different twist, the chewy pull and cinnamon warmth of cinnamon swirl banana bread offers a sweet companion to savory homemade bread dishes. Likewise, for a kick of spice, cheddar jalapeno cornbread muffins add a complementary edge. For a wholesome snack between meals, gingerbread protein snacks bring a festive, portable touch. These variations connect a broader bread narrative, inviting multiple voices to the table.
Common Questions
What makes this homemade bread different from other breads?
This homemade bread balances simplicity with the tactile and sensory involvement of bread dough preparation and bread rising techniques. It’s approachable yet rewarding, offering a crusty exterior and tender crumb that feel handmade. Unlike more complex breads like sourdough, it needs less time investment but still provides profound satisfaction. For those curious about different methods, a look into sourdough bread making at The Clever Carrot enriches your understanding of fermentation’s role.
Can I prepare this homemade bread in advance?
The dough can be prepared and refrigerated after the first rise, slowing fermentation and allowing more complex flavors to develop. This approach fits well with busy schedules, turning bread making into a flexible ritual. Baking the next day delivers an equally crisp homemade bread crust and fresh warmth.
How do I know when my homemade bread is properly done?
When baking, a simple technique is to tap the bottom of the loaf. A hollow sound signals thorough cooking. Internal temperature should reach around 95°C (200°F) for confident doneness. Visual cues like a golden-brown crust and strong aroma provide additional confirmation.
What are good substitutions when making homemade bread?
Swapping bread flour for whole wheat or spelt is possible but requires adjusting water quantity and bread rising techniques to accommodate denser flours. Olive oil can be omitted for a traditional lean dough. You can also mix seeds or herbs into the dough or sprinkle on top before baking for added texture and flavor.
Why does my homemade bread crust sometimes turn out too thick or hard?
Crust texture responds to baking temperature and steam. Too hot an oven without humidity yields a thick, hard crust. Introducing a pan filled with water during baking creates steam, softening the crust while preserving crunchiness. Adjusting baking time and preheating practices also influence crumb and crust balance.
Is kneading the dough really necessary?
Kneading develops gluten to form the bread’s structure. However, less kneading or no-knead methods exist, like the artisan-style bread featured in the master recipe from Artisan Bread in Five Minutes. These rely on longer fermentation for texture development. Experimentation with kneading can help you find a method suited to your schedule and palate.
How do I store homemade bread to keep it fresh?
Homemade bread is best enjoyed fresh but can be stored wrapped in a clean towel at room temperature for up to two days. For longer storage, slice and freeze, then toast slices directly from the freezer. Avoid plastic wrap for room temperature storage, which traps moisture and softens the crust.
I’ve received questions on adapting this homemade bread dough to suit dietary needs. Using gluten-free blends changes the bread dough preparation process considerably, often requiring binders like xanthan gum. While this basic homemade bread recipe doesn’t cater to gluten-free diets outright, there’s a growing world of artisan bread making accommodating diverse ingredients.
Closing Thoughts
Making homemade bread is an act of patience and care, simple but deeply rewarding. It invites you to step into a kitchen moment where the mundane becomes meaningful and ingredients tell stories through transformation.
Quality ingredients matter: Flour, water, yeast, and salt combine to create a blank canvas for flavor and texture.
Patience in bread rising techniques rewards with a crust that crackles and crumb that whispers softness.
Variations open doors: Whole wheat, herbs, or a no-knead approach shift the bread’s story without losing its essence.
Three variations I’ve tested include a whole wheat artisan loaf inspired by this easy whole wheat artisan bread recipe from The Conscientious Eater, a fragrant sourdough loaf that prolongs fermentation for tang and depth (more at The Clever Carrot), and a speedy batch resembling the Artisan Bread in Five Minutes approach for busy days.
Whatever path you choose, homemade bread offers a grounding ritual—a chance to slow and savor. It’s a food narrative that connects clay-like dough and oven heat to human history and shared moments. May your own homemade bread journeys be filled with the small wonders and warmth this simple food brings.
For further inspiration and variation, you might like related explorations at FoodNarrative: cinnamon swirl banana bread, cheddar jalapeno cornbread muffins, and gingerbread protein snacks, all carrying their own stories and flavor deepness.
Trust in the process. Let the dough rise, and in doing so, find a moment of calm in your kitchen. This homemade bread waiting to be shared might just become one of your favorite food stories.
Homemade Bread
This homemade bread recipe yields a soft, golden loaf with a crispy crust, perfect for any meal or snack.
- Prep Time: 15 minutes
- Cook Time: 35 minutes
- Total Time: 1 hour 50 minutes
- Yield: 1 loaf (about 12 slices)
- Category: Dinner
- Method: Baked
- Cuisine: American
Ingredients
- 3 1/2 cups all-purpose flour
- 1 packet (2 1/4 tsp) active dry yeast
- 1 1/4 cups warm water (110°F/45°C)
- 2 tablespoons sugar
- 2 tablespoons olive oil
- 1 teaspoon salt
Instructions
- In a small bowl, dissolve sugar in warm water and sprinkle yeast on top. Let it sit for 5-10 minutes until frothy.
- In a large bowl, combine flour and salt. Add yeast mixture and olive oil.
- Mix until a dough forms, then knead on a floured surface for about 8-10 minutes until smooth and elastic.
- Place the dough in a greased bowl, cover with a clean towel, and let it rise in a warm place for about 1 hour or until doubled in size.
- Punch down the dough, shape it into a loaf, and place in a greased loaf pan.
- Cover and let rise again for 30-40 minutes until it has risen slightly above the pan.
- Preheat oven to 375°F (190°C). Bake the bread for 30-35 minutes or until golden brown and sounds hollow when tapped.
- Remove from oven, let cool on a wire rack before slicing.
Notes
For a richer flavor, brush the top with melted butter immediately after baking.